Thursday 29 September 2011

F.R.I.E.N.D.S. swap

this box will be off to the post office first thing tomorrow morning...
and a little sneak peek at the contents...


sub-contracting

i have a stash of quilt tops in my cupboard (they are listed on the side of my blog) and i have been procrastinating with quilting them so when Khristina at Sew Prim Khris posted this, i was excited!  i rushed over to Dawn's blog and contacted her asap

Dawn has been lovely (and very patient!), my tops were quilted beautifully at a very reasonable price and were back in my hands quickly... have i said yet how much i LOVE the fact that i didn't have to do the quilting???


now i just need to label and bind them.

thank-you Dawn for doing such a great job!

Saturday 24 September 2011

it's all in the details

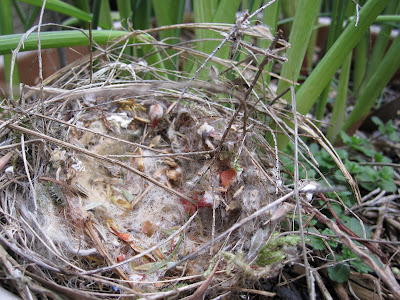
a couple of days ago i found the most exquisite little bird's nest on my front lawn, i am guessing that it was blown out of a nearby tree, thankfully i couldn't see any eggs or baby birds nearby.  whoever made this nest was very dedicated, it has been lined with cat fur (from my cat!!) and decorated with seed heads...


Sunday 11 September 2011

my parcel has arrived!

my selvedges fabric has arrived!  all the way from Quilt Sandwich Fabrics in the USA, Kris is lovely and i am sure that i will buy from her again


i LOVE the way those little spiders march across the selvedges!
edited to add - i should have mentioned that this fabric is from "Haunted Mansion" by Moda

Wednesday 7 September 2011

Handmade pay it forward

way back in January i committed to a handmade pay-it-forward swap.  i have finally packed and posted my gift to Cheri, hopefully it wont take too long to arrive. 

i wonder what is in the parcel???  and i hope you like it!

Sunday 4 September 2011

Fun with zips and ribbon

earlier in the week i found a wonderful new (to me) website, Craft Passion, it has some great tutorials.  i fell in love with the zip pouches

mum and i spent a couple of hours this afternoon stitching away. making Zip-its...they are a little fiddly, and the instructions could do with a little tweaking to make a couple of steps clearer, but mum and i muddled on through...


if you decide to make this bag, here are a couple of tips...
- use 21" of ribbon with a 20" zipper (and i would suggest using ribbon that is 5/8" wide)
- leave 1" of ribbon loose (unsewn) before the starting dot.  this gives you enough ribbon to tuck in and get a neat finish.
- don't sew your ribbon close to the zipper teeth (leave a gap, as shown in the photo above), mum found out the hard way that not doing so will give you a very small bag!

Friday 2 September 2011

???

well, i think i have officially slipped over into "nutty" territory - i just bought a yard of fabric because it has a cute selvedge!!  will post a photo when it arrives