Friday 31 December 2010

apocketfulofmysteries - clue #17

all done... it has been finished for hours, but i took a while to post the photo!  the color combination is lovely and i am happy with how the finished top is looking - even if it isn't my normal color choices

  
and my little quilt helper in the corner of the photo!

i decided to put this quilt on the couch to take a photo, when i stood back i realised that this quilt will be perfect on my couch in the lounge room.  the walls are a very pale khaki color and the couch is a medium green - very similar to the colors in the quilt

a slight interuption

i had a slight interruption to my sewing (click on the photos to make them bigger)....

we have had extreme heat today (38degC) and very strong winds all day.

soon after lunch the power went off, i checked the switch box (all ok) so i assumed it was a tree down or a fire that had interrupted the power.  then i heard a chainsaw and looked out my front window to see a police officer directing traffic.  well, sticky-beak that i am, i had to head out to the street to see what was happening (and yes i took my camera with me!!)

turns out that the wind had blown down a tree, which covered the road and the SES (state emergency services) were working hard to clear the road.  about an hour later we had power again, a blessing on this HOT day.

now, back to sewing

apocketfulofmysteries - clue #11 and #12

four block D's and 12 block E's
and that is the last of the blocks!! next step it to assemble this into a top

apocketfulofmysteries - clue #13

four block F's.... my last clue for tonight, because i am off to bed

Thursday 30 December 2010

apocketfulofmysteries - clue #14, #15, #16

and yes, i am doing these last few clues in the wrong order!

one block G, one block I and three block H's


apocketfulofmysteries - clue #8, #9, #10

one block A, three block B's and one block C

apocketfulofmysteries - clue #7

22 border units are all done...

apocketfulofmysteries - clue #6

49 sashing units are done...

apocketfulofmysteries - clue #5

30 "hug" blocks are done...

Tuesday 28 December 2010

apocketfulofmysteries - clue #4

22 cute little flying geese are made (using both the companion angle and the easy angle rulers)...
 have printed off clue #5 and will start on it tomorrow

now, off to bed to read my book.

apocketfulofmysteries - clue #3

49 quarter-square triangles (hourglass blocks)...


made using the companion angle (another ruler that i haven't used before), i do like this ruler and i look forward to using it again

apocketfulofmysteries - clue #2

120 half-square triangles later and i have finished sewing clue #2

this was my first time using the "easy angle" ruler - it was easy and i think i will use this method to make half-square triangles again

apocketfulofmysteries - clue #1

cutting is all done...

Monday 27 December 2010

apocketfulofmysteries - clue #1 is mostly done

i spent yesterday catching up on some jobs that got put on the back burner during December, and i also managed to clean up my sewing room - it had turned into a festive dumping ground!!

today i decide to relax and start on the current apocketfulofmysteries Christmas mystery quilt (called "hugs and kisses"), my fabric choices are here

all of the strips for clue #1 are cut, next step is some sub-cutting. 

now i am off for a slightly belated Christmas catch up with a friend, but i should be able to finish off the cutting when i get back, and maybe start on clue #2 tonight

Saturday 25 December 2010

It's Christmas Day in Australia...

the festive season has really slowed my blogging down this year!  i hope that everyone has a wonderful Christmas (however you celebrate) and a relaxing new year!!


Saturday 4 December 2010

And another mystery quilt

Dorothy from apocketfulofmysteries has posted the fabric requirements for her annual Christmas mystery quit, this year the quilt is called "hugs and kisses".  my fabric drawers are VERY full at the moment (i inherited some fabric when a friend passed away recently) so i decided to join in.

the mystery is a 2 color quilt and we can use scraps or yardage.  my green/blue drawer is almost overflowing so i decided to use some dark green fat quarters as the main fabric for the mystery quilt, the other fabric was in my neutral drawer and looks great with the scrappy greens.
if you have been following my blog for a while you will have noticed that this color combination is quite unusual for me, as i tend to use strong colors and striking color combinations.  i am looking forward to stepping out of my comfort zone!

P.S. now that summer has finally arrived, i thought it was time for a color change on my blog!

Friday 3 December 2010

Sunday 28 November 2010

Waiting....

i have also ordered a copy of Jelly Roll Quilts from Fishpond (they have free shipping at the moment! i have no connection to the company - i am just a happy customer)

a friend had a copy at a recent quilter's gathering and i fell in love with the book!  it has some really nice quilts in it and i cant wait to have my own copy...
  
P.S. my book is here and i LOVE it... just need to decide which quilt to make first!

Reading, Reading, Reading

the past few weeks i have been in a mood to read, so i dug through my stash of unread books and spent some time with a few of my favorite authors:


and i am half way through

Sunday 21 November 2010

Disappearing 9-patch (the final post!)

ETA - i dont know why the font size is weird, i have tried to fix it but blogger isnt cooperating at the moment!


in continuation of my series of posts on D9P blocks;  Disappearing 9 Patch - variation on a theme;  Disappearing 9 Patch - layout ideas  here is my final post on D9P blocks 


Simply...

-  cut a square of fabric the same size as the D9P block (after your 9 patch has been quartered)
-  draw a line from corner to corner on your plain square
-  place your plain square on top of a D9P block (right sides together)
-  using the line as a guide, sew 1/4 inch seam down each side of the line
-  cut apart on the line
-  press your block (seam goes towards the plain square)
- you should have 2 different blocks
play around with the layout!

it's a tough life

There's a new mystery quilt...

Ann is hosting another New Year's Eve mystery quilt at Fabricaholicsanonymous.  i LOVE Ann's mystery quilts, so i am really looking forward to this one (my 3rd NYE mystery with Ann)

i have a personal rule for mystery quilts - if i want to join in, i need to find all of the fabric required in my stash!  so this morning i printed out the NYE mystery quilt requirements list and searched my stash for the perfect group of fabrics:
FOCUS - colored squares
POP - yellow glitter
BACKGROUND - white with little colored dots
MEDIUM - aqua

i also found the courage to finally add the purse feet to my  multi-tasker tote - they were a bit fiddly, but i am really happy that i put them in

Saturday 20 November 2010

A quilter is...

this was posted at one of my yahoo groups and i just had to share it with you...

A Quilter is:
 
Someone who assiduously clips coupons and hunts for bargains at the supermarket,  
but buys untold yards of fabric, regardless of price.
 
Someone who pays to have the ironing done, 
but thinks nothing of standing for hours pressing twenty yards of fabric for a quilt.
 
Someone who sees life through the eye of a needle, and that is a very special thing.
 
Someone who is bored silly hearing about other people's dumb hobbies, such as sky-diving, motor cycling or stamp collecting, 
but constantly fascinates everyone she comes in contact with by sharing her quilts and  quilting experiences.
 
Someone who has not been able to balance her check book since March 1979,  
but can figure the yardage requirements for a Log Cabin Quilt and have just enough left over for a pin cushion.
 
Someone who enjoys sewing a quilt, 
but hides the mending until the garments are either outgrown or out of style. 

Someone who cannot see cobwebs hanging from the ceiling, dust balls under the bed or a sink full of dirty dishes, 
but can thread a size 10 needle in the dark.

Anonymous

Wednesday 10 November 2010

Almost done

well, here is my almost completed multi-tasker tote - i just have to pluck up the courage to put the bag feet on and i am done!

i ended up making a different flower to decorate the bag (tutorial is here), i decided to make the petals 2 sided (so they wouldn't be too floppy and to help with durability).  i simply cut twice as many petals as directed and fused them together with some light weight fusible webbing.  yet again, my photos don't do it justice - it is cute!!


Sunday 31 October 2010

Multi-tasker Tote

i spent today working on my "multi-tasker tote" by Anna Maria, it's been cut out for a while and i finally started sewing it last sunday.

i used a laminated cotton on the exterior of the bag and regular cotton fabric for the pockets and interior.  the laminated cotton was a pleasure to sew (i bought a nice new non-slip foot for my sewing machine) and it is so lovely and soft

it's nearly done, just the finishing touches left - a button on a pocket, a cute flower to pin on the front, some bag feet to add and sew up the turning hole.

it's a cute bag but the instructions aren't as good as i am used to (i wouldn't recommend the pattern to a beginner), i am glad that i have made a few bags or i would have been lost!!

i added:
- a zipped pocket to the inside
- a button closure to the patch pocket
- a magnetic closure to the top
- some metal bag feet
- a cute flower pin to decorate the outside (still in the process of being made!)

i also used a different method to add the bag floor (this tutorial is the one that i used) the bag pattern directed me to iron the peltex (bag floor) to the lining and exterior, i wasn't confident that this method would be durable in the long term.  the method shown in this tutorial just looks a bit more durable/practical

will post photos as soon as it is finished!

Thursday 21 October 2010

AHHHHHH....

OOOPS....

i just accidentally deleted 25 comments from my blog

sorry if one of the comments was yours - it was a complete accident and blogger says i cant fix it

Monday 18 October 2010

F.R.I.E.N.D.S. swap parcel received

my F.R.I.E.N.D.S. swap parcel has arrived from M at Farmyard Crafts!!

a wonderful parcel was waiting on my doorstep when i got home from work tonight - i rushed inside, ripped the post bag open like a small child on Christmas morning, and all of these wonderful gifts spilled out...
I slowly opened each one - smiling, giggling and very excited!

F is for fabric fat quarters

R is for RicRac

I is for inspiring magnet

E is for exquisite pin cushion (made by M.)

N is for Nellie's sewing bag (made by M.)

D is for dragonfly journal

S is for swell self-covered fabric buttons (made by M.)
i LOVE, LOVE, LOVE all of my gifts and i was so blessed to get M. as a swap partner!

Sunday 17 October 2010

Reversible ironing board cover - a little tutorial

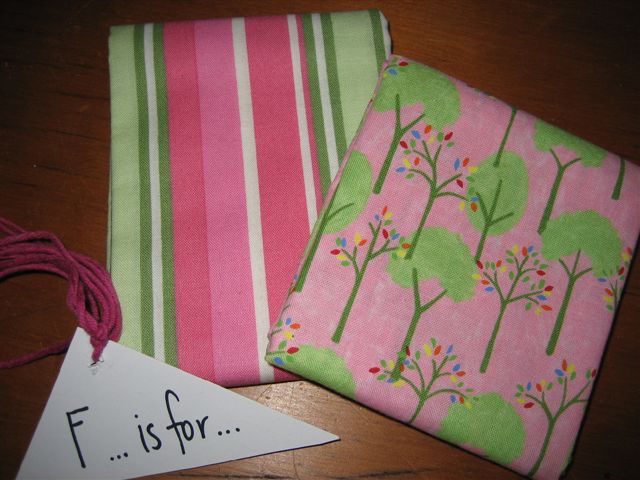
as i said in my last post, my ironing board cover i looking tatty and sadly it didn't survive a recent encounter with the washing machine!  oh, well it was a good excuse to use some lovely fabric that inherited when a friend passed away recently.

my poor old, torn, bumpy cover...

You will need:
*  fabric - approx 1.5 to 2metres, depending on the size of your ironing board and the width of the fabric
*  tearaway stabiliser or butchers paper to make your pattern from
*  cotton wadding - enough to cover the top of your ironing board 4 times (i bought 1.5m of wide wadding)
*  5mm wide elastic (approx 2m)
* cotton and general sewing supplies

this is a simple tutorial and i am assuming that you will have some basic sewing skills

1.  remove the old ironing board cover - and throw it away to ensure that you finish your new cover!!

2.  put some paper/tearaway stabiliser on the floor and place your ironing board top down.  trace around the edges.

3.  draw a line approx 4" out from your ironing board outline.  this is an allowance for the sides of the ironing board top, an underlap and a seam allowance.  cut out on this line.  in my photo you can see how much bigger the pattern is...
4.  cut 2 from your fabric and 2 from wadding


5.  layer 1 of your fabric pieces with 1 of your wadding pieces.  quilt as desired.  i simply quilted some straight lines.  repeat with the other piece of fabric and wadding. 


6.  place your 2 quilted panels right sides together and sew around the edges (use a generous 1/4" seam)  remember to leave an opening so you can turn your cover right side out!!  i left my opening in the wide end of the cover

7.  turn your cover right side out (pause to admire your creativity!!) and press.  when you get to the opening, remember to press the seam allowance in - this will make sewing it closed easier

8.  now it's time to sew a casing for your elastic.  you will need to sew a line 1/2" from the edge of your cover.  sew all the way around.
9.  it's time to get the elastic into your casing.  pin your elastic to the cover (so that the end doesn't disappear into the casing) attach a safety pin/bodkin to the opposite end of the elastic and start threading it through the casing - this can be a bit fiddly, but persist, we are nearly done!

10.  pause to thank your quilting assistant for his help

11.  put your cover onto your ironing board and adjust the length of your elastic.  when you are happy with the fit, tie the 2 ends together with a knot.

 12.  slip stitch the opening closed, make sure that you tuck the elastic in as you sew

13.  because my ironing board is getting on and is a little rusty (don't want rust on my new cover!), i cut 2 layers of wadding the same size as the top and put the cover on over them.

14.  put your new cover on your ironing board and adjust the gathers until you are happy.

15.  step back and smile... you have a beautiful new ironing board!